Hi, I'm pamela@! Peter offered me some space to write about OpenBSD and networking, and I come bearing some how-tos which hopefully assume less prior knowledge than most, and maybe later some thoughts about more esoteric development topics.
I currently maintain the OpenBSD changelog so I can talk shop, but working on mostly loaned equipment and not working in tech, I don't get enough practical experience. I have to keep notes about some odd things! But I was recently given a nice new laptop which should keep getting fresh updates for years to come. \o/ It has a brand new BIOS version, so let's slap that on here and write out how we did it.
Wrangling your BIOS Update ISO
This laptop is a ThinkPad x395, and I can go to the Lenovo support site and see there was a new BIOS version released on 10 Jun. We want the bootable CD image and can give it a quick check with sha256(1) just in case.
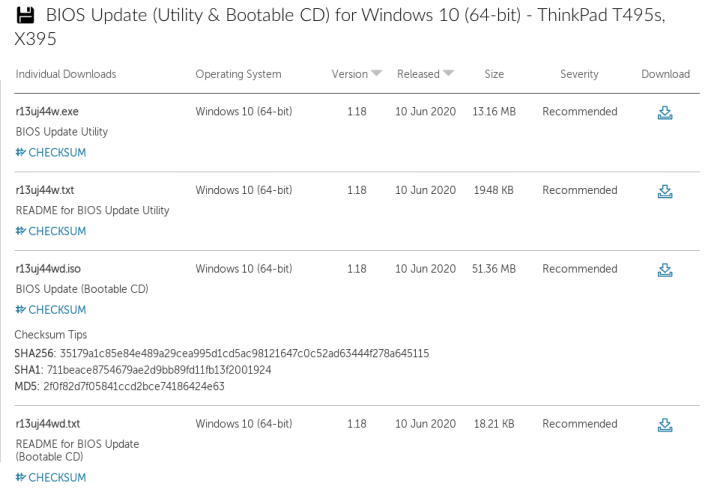
epaaj:~/Downloads$ sha256 r13uj44wd.iso
SHA256 (r13uj44wd.iso) = 35179a1c85e84e489a29cea995d1cd5ac98121647c0c52ad63444f278a645115
No optical drive on this model, so we will use the handy GetElTorito utility from ports to use this CD image on our USB stick. Just install it with pkg_add(1):
epaaj:~$ doas pkg_add geteltorito
The name refers to the "El Torito" bootable CD-ROM standard from the mid-1990s, which introduced a "Boot Record" volume descriptor and created a format for bootable CD-ROM discs containing one more more bootable images. GetElTorito, under the hood, is simply a perl script which extracts the first boot image from within an .iso. Since we can boot off any USB stick (in theory), we only need the data.
epaaj:~/Downloads$ geteltorito r13uj44wd.iso > x395_1.18.fs
Booting catalog starts at sector: 20
Manufacturer of CD: NERO BURNING ROM VER 12
Image architecture: x86
Boot media type is: harddisk
El Torito image starts at sector 27 and has 104448 sector(s) of 512 Bytes
Image has been written to stdout ....
We now have the BIOS update file x395_1.18.fs ready to go.
Creating bootable media
I'm going to be using a USB stick to do this transfer, and since my USB sticks are generally also borrowed, that means I've quite literally just picked something random up off a table and should make sure there's nothing important on it.
Here's the update to the dmesg:
umass0 at uhub0 port 6 configuration 1 interface 0 "SanDisk Ultra USB 3.0" rev 3.00/1.00 addr 2
umass0: using SCSI over Bulk-Only
scsibus4 at umass0: 2 targets, initiator 0
sd2 at scsibus4 targ 1 lun 0: <SanDisk, Ultra USB 3.0, 1.00> removable serial.07815591150714116163
sd2: 117312MB, 512 bytes/sector, 240254976 sectors
Plenty of room, and now we know it's using sd2. Let's take a peek using disklabel(8)! That will show us the partition layout in use and tell us about how it's formatted.
epaaj:~$ doas disklabel sd2
# /dev/rsd2c:
type: SCSI
disk: SCSI disk
label: Ultra USB 3.0
duid: 0000000000000000
flags:
bytes/sector: 512
sectors/track: 63
tracks/cylinder: 255
sectors/cylinder: 16065
cylinders: 14955
total sectors: 240254976
boundstart: 0
boundend: 240254976
drivedata: 0

16 partitions:
      #              size           offset  fstype [fsize bsize   cpg]
      c:        240254976                0  unused
Oh. There's nothing at all! This one is either entirely unused or has been cleaned up thoroughly. The c: partition is just the disk in its entirety. If there were data to worry about on here, we'd expect to see one or more partitions in addition with filesystem types specified.
Here's an example that already has some assorted junk on it:
epaaj:/mnt$ disklabel sd2
# /dev/rsd2c:
type: SCSI
disk: SCSI disk
label: Cruzer Dial
duid: 0000000000000000
flags:
bytes/sector: 512
sectors/track: 63
tracks/cylinder: 255
sectors/cylinder: 16065
cylinders: 3818
total sectors: 61341696
boundstart: 0
boundend: 61341696
drivedata: 0

16 partitions:
        #       size    offset  fstype [fsize bsize   cpg]
        c:  61341696                0  unused
        i:  61341664               32   MSDOS
So this stick does have one existing MSDOS partition filling the stick. in this case I would want to mount that specific partition as follows:
epaaj:~$ doas mount -t msdos /dev/sd2i /mnt
Just to look through and make sure there's nothing important on there. If I don't care, though, we don't actually need to mount it and rummage around. We will be overwriting the entire stick to make a bootable version, and the original contents can simply be blown away.
We're going to use dd(1) to move our image onto the stick. Our input file is the image just created with geteltorito, the output file is the raw device corresponding to our USB stick, and optionally we can set a larger block size of a megabyte for speed.
Make sure you're using the correct device as output before you start! Double check the number, and then specify 'r' for raw (direct access to the device) and end with 'c' indicate we are working with the whole disk at once. My USB stick is still designated sd2, and I will be transferring the image to /dev/rsd2c.
epaaj:~/Downloads$ doas dd if=x395_1.18.fs of=/dev/rsd2c bs=1m
51+0 records in
51+0 records out
53477376 bytes transferred in 1.398 secs (38228412 bytes/sec)


epaaj:~$ doas disklabel sd2
# /dev/rsd2c:
type: SCSI
disk: SCSI disk
label: Ultra USB 3.0
duid: 0000000000000000
flags:
bytes/sector: 512
sectors/track: 63
tracks/cylinder: 255
sectors/cylinder: 16065
cylinders: 14955
total sectors: 240254976
boundstart: 0
boundend: 240254976
drivedata: 0

16 partitions:
#                size           offset  fstype [fsize bsize   cpg]
  c:        240254976                0  unused
  i:           104416               32   MSDOS
Now we are ready to boot from this stick! For this machine, that involves pressing Enter and F12 to temporarily select the stick to boot from, and then updating the system. It takes maybe 5 minutes with one restart near the beginning, and then you're all set.
Cleanup
I'm not going to do it with this one, as it's a waste of a fairly large USB stick (which I do not own) but once you're done with your BIOS update, you can grab one of the installXX.fs images from your local mirror and turn your USB stick into a bootable recovery tool. Just pull the one for your architecture and use dd(1) exactly the same way, overwriting the raw device (/dev/rsd?c) as before. You can make yourself a pretty USB stick necklace and always be able to get a shell or fresh install. I once had an encrypted disk fail when I only had unreliable wireless internet and no other machines... now I really like making sure I have one of these to hand.